
This adorable DIY GINGERBREAD HOUSE VOTIVE HOLDER makes a great homemade gift! And it is simple and inexpensive enough that you can make a whole village!
Check out the supply list below and then click the MAKE IT button for a video tutorial
(You will be redirected to instagram).
Supplies
Vellum paper (this is a translucent paper)
Square Votive Holder - 3” x 3”, available at the Dollar Tree
Mod Podge
Foam brush
Chunky white glitter for snow
Scissors
Battery-operated tea light
Optional: Epson Salt (for inside the votive holder to secure light and add a sweet scent)

Easy Turkey Craft
This simple Thanksgiving craft makes a fun Turkey Day activity to keep the kids busy before dinner! This is also a great classroom activity. You can swap out the printable “tail” template I have created for your own printed paper (or have the kids color their own!). Remember, you will need two 8.5” x 11” sheets of paper for the tail and one piece of card stock to print out the head and handle template. Click the “Make It” button for the quick instagram video tutorial.
Supplies
One piece of card stock, two sheets of printer paper (see note above for alternatives)
(2) Jumbo popsicle sticks
Glue and clear tape
thin rubber band

Click Here to see video
These Little Dollar Store Mason Jar Ornaments are
Not Just for Christmas!
TARGET AGE: 6 (with supervision) -adult
SENSORY FRIENDLY? low sensory concerns.
Supplies:
Mason Jar Ornaments (Dollar Tree)
Paint - Orange & White
Paint Brush (for lid, optional)
Back Sharpie
As an Amazon Associate, I may earn from qualifying purchasesTry this Eye-Popping Halloween Craft for some spooky fun for all!
Dryer Ball Eyeballs
TARGET AGE: 8-adult
SENSORY FRIENDLY? This craft uses puffy paint in bottles but may end up on
hands. Wear gloves for those who have a sensitivity to this sensation.
Supplies:
( As an Amazon Associate, I may earn from qualifying purchases).
Dryer Balls - I used these
Puffy Paint - red, black and white
Elmer’s Glue Stick
Fabric scraps for pupils and irises (tip: I used the flat, scratchy green sponges from the Dollar Store for irises, and black felt)
Scissors
Optional: Googly eyes and Halloween adhesive eyeballs. I found mine at Michael’s. You can cut circles out of fabric and use
white & black puffy paint for details if you don’t have craft eyeballs on hand.
*Allow puffy paint to dry for a few hours or overnight before moving to next step. You can use a heat gun if you are impatient like me. Here’s my go-to dryer.
Watch Video Below for a quick how-to;

So simple it’s almost like witchcraft!
Liquid Sculpey is not just for Halloween, but this time of year means the perfect season to discover the possibilities of this fun, easy and kid-friendly craft supply.
Check out this quick video for some fiendishly fun Halloween ideas using
this versatile form of polymer clay.
9 Easy Steps
Purchase a few bottles of Liquid Sculpey. It will go fast when you are having fun! I like the Pearl and White colors the best.
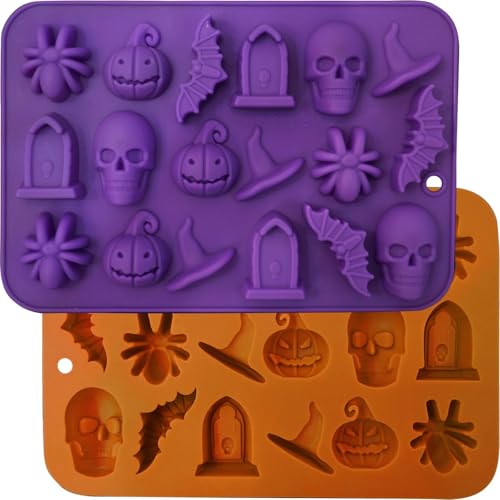
Purchase some spooky Halloween silicone molds if you do not have some already. You can use the silicone molds intended for candy (found at hobby stores like Michael’s) or those specifically for crafts. Both work. I will link some below.
Heat your oven to 275 degrees.
Shake your liquid Sculpey and squeeze enough into the mold to cover the bottom. You do not need to make it too thick, just thick enough that you can no longer see the mold and so it won’t be so thin it breaks.
Tap your filled molds on a hard surface to remove air bubbles.
Place molds on a cookie sheet and bake for about 30 minutes.
Remove from oven and allow to cool for a few minutes…they will be hot!
Gently bend the silicone and push the baked shape out of its mold. With
sharp scissors, trim off any excess dried clay around the edges.Use finished molds to add to decor, make into jewelry, give as goody bags items, add to art work and more!!
We would love to know what you come up with! Happy “sculpting”!
Check out the video below!
C
EEK! This Dollar Store craft is
so cute it’s scary!
(full screen is best for viewing)Die-Cut Halloween Wreath
TARGET AGE: Adult
SENSORY FRIENDLY? This craft uses Mod Podge. While this is applied with brush, you may need to use fingers to press down on paper. If this texture bothers your hands, we suggest wearing gloves.
Supplies
Wooden hoop from Dollar Tree
"EEK" die cut hanger from Dollar Tree
Modpodge
Gold metallic paint
Gold metallic paint pen
Halloween themed paper (I used cupcake liners cause I had a ton leftover from last year- napkins would be great too!)
Hot Glue gun
Plastic spider rings and other Halloween trinkets
Instructions
Paint hoop gold, allow to dry
Rip up patterned paper into scraps
Decoupage onto the EEK letters with modpodge and allow to dry
Outline letters in gold leaf paint pen
Add gold leaf paint to spiders and other Halloween trinkets to give them an authentic spooky vibe
Hot glue EEK sign to hoop
Hot glue trinkets onto hoop and letters
Hang!


