Who wants to play dolls?
A simple guide to the basics of creating adorable peg dolls cute enough to give, sell or collect!
Create these sweet dolls with just a few simple supplies! Add clothing, accessories and little details to make them uniquely your own.
You are never too old to play with dolls… but making them is even more fun!
Whether you are making them as gifts, to sell, or simply for your own pleasure,
these sweet peg dolls are fun for any age!
Make sure to view the video detailing how to create the arms and hands for these dolls.
Supplies: Sharp scissors, standard clothespin, fine embroidery thread, Dowel Cap End with 1-1/2" x 3/4" hole (click to find exact size on Amazon), pipe cleaner, paint or colored pencils, sturdy fabric, needle and thread, embellishments for details
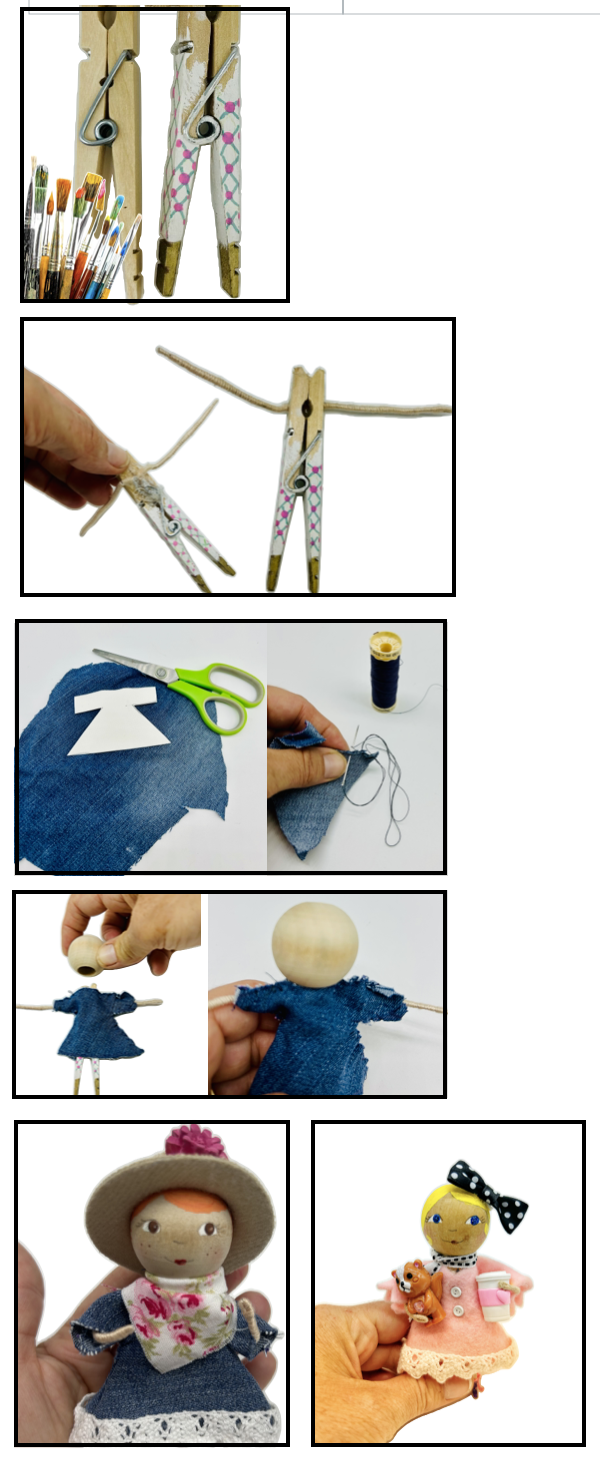
1.. Paint the legs and shoes however you would like.
2. Attach the arms with hot glue to the back of the clothes pin where the doll’s upper back will be. (See video for making the arms).
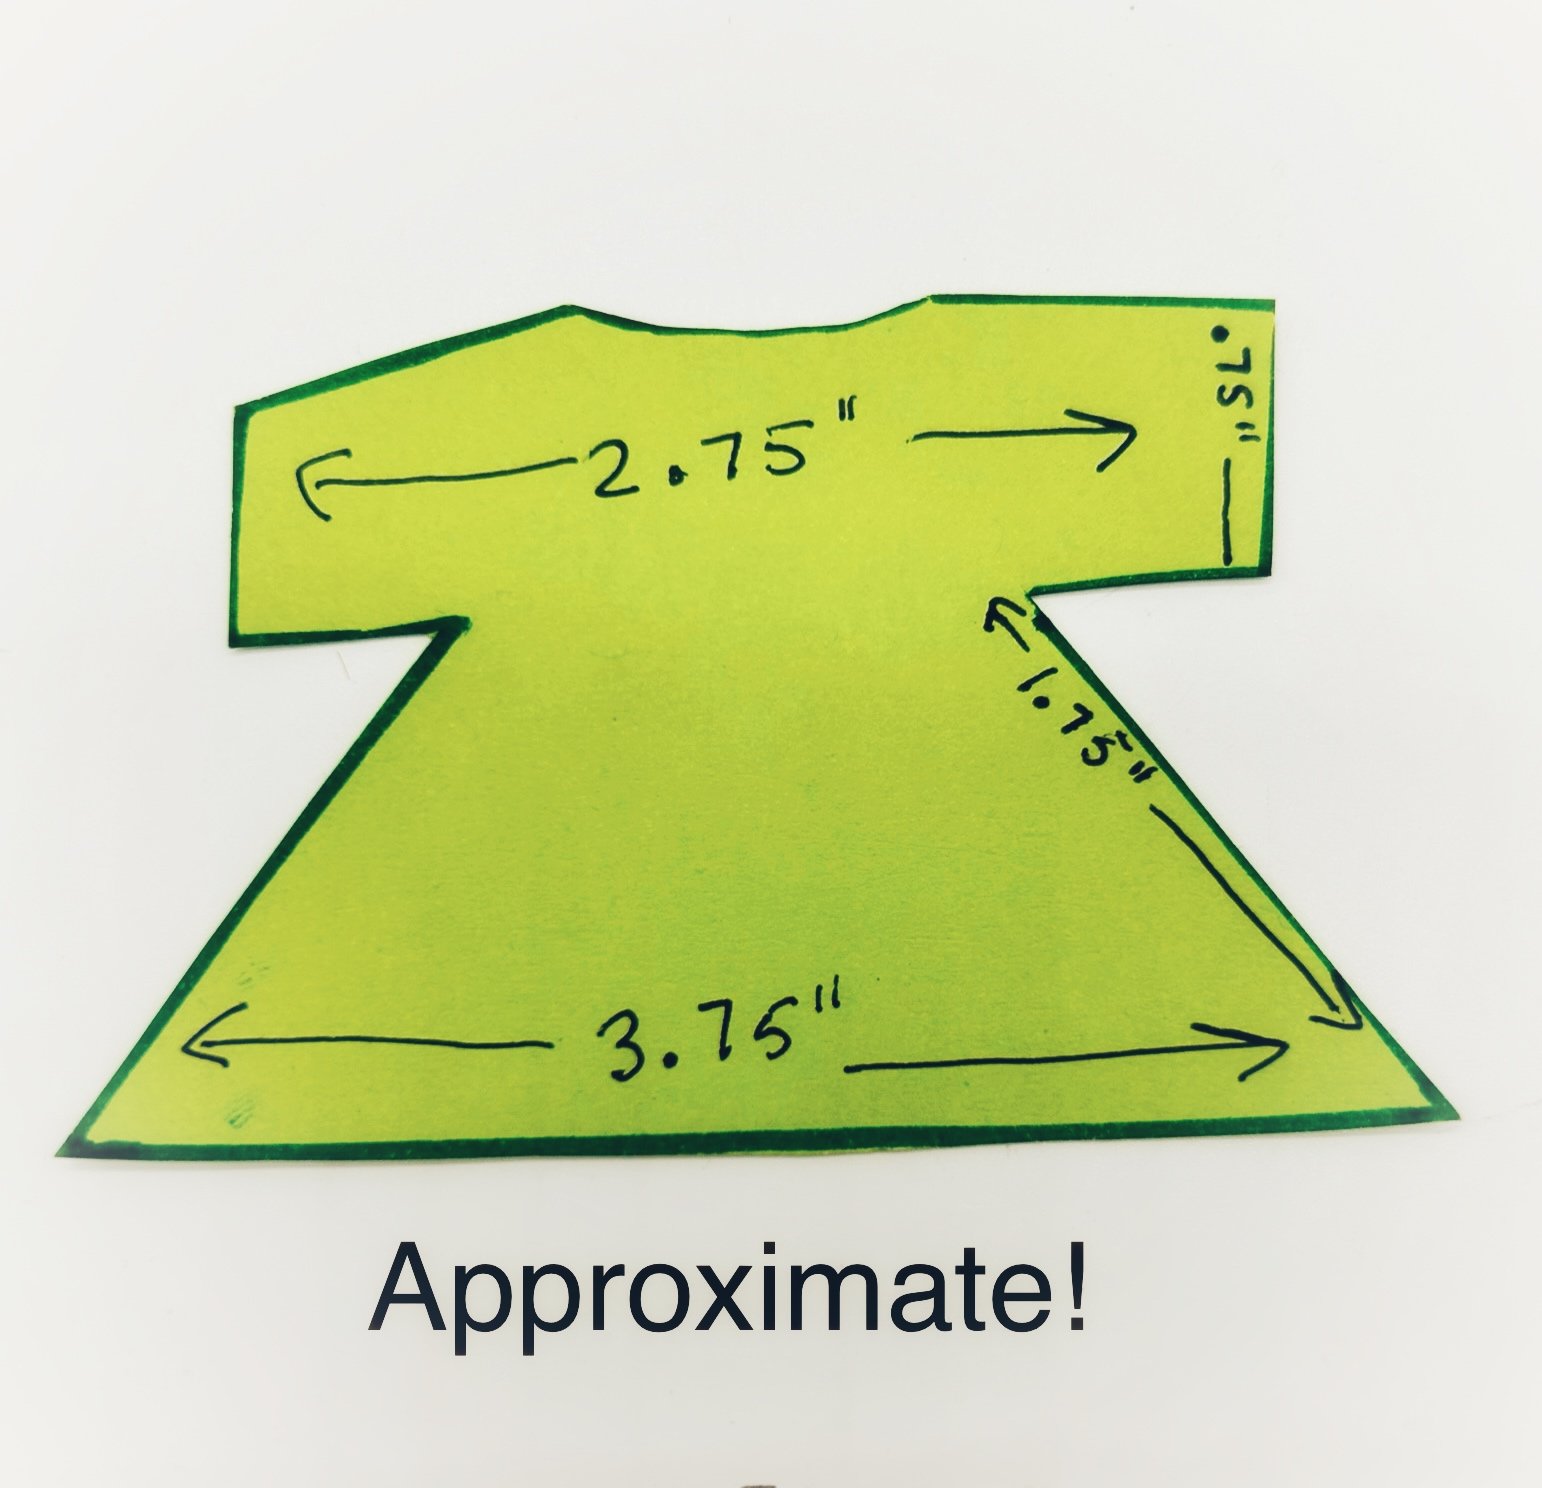
3. Use the measurements shown in the attached pattern to draw your own dress pattern (approximate measurement is fine). Cut out and trace the front and back of the dress onto your choice of fabric (see below). A stiffer fabric or thicker felt work best for me. Flip the two dress cutouts so that the outsides of the fabric are facing each other (as if the dress is inside out). Sew one side of the dress, making sure to leave a hole for the arm at the end of the sleeve. Once one side is sewn together, flip the dress so that it is no longer inside out. The sleeves are tiny so you may need to use a pencil to push the sleeve through so it is no longer inside out. Put one of the doll’s arm through the sewn sleeve and sew the remainder of the dress while it is on the doll. Make sure to put the head on AFTER the dress is sewn on.
4. Paint the face and hair (you may wish to do this before you attach the head). TIP: Blush works great for natural looking cheeks! When attaching the head, push down hard so the head is secure. There is no need for glue as the fit will be tight.
5. Embellish and accessorize– this is my favorite part!! I always add a scarf or bandana to cover the bit of clothespin that you can see. Since her arms are flexible you can give her something to hold or carry.
Learn how to make your doll’s arms and hands in this step-by-step video! Best viewed in full screen mode.
Have fun adding details like lace, bows, hats and bandanas!
Create a template for your dress…or come up with your own clothing ideas! You do not need to be a seamstress to dress this little doll!


